Before uploading, you'll need to ensure some fields are populated in AutoMail®.
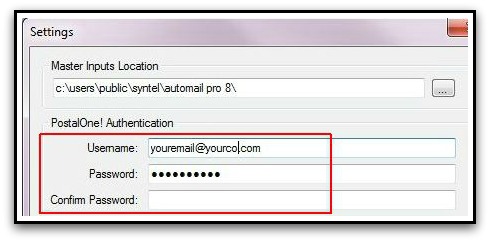
You'll need the following information as you configure AutoMail® for testing:
Some information may already be populated.
| o | Mailer ID - found in 'Business Customer Gateway' > look under 'Designe & Prepare' heading > select Mailer ID'. |
| o | Permit Number - found on 'Business Customer Gateway' > 'Account Services' heading > 'Manage Permits' > select your organization's name. |
| o | CRID - (Customer Reference Identification) found on 'Business Customer Gateway' > 'Account Services' heading > 'Manage Permits'. |
| ▪ | Your Mailer ID, Permit Number, and CRID are all displayed when you login to the USPS Business Customer Gateway site. |
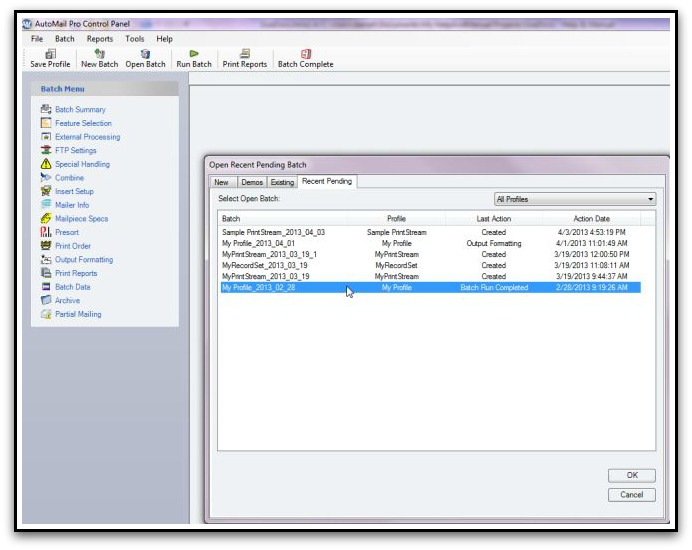
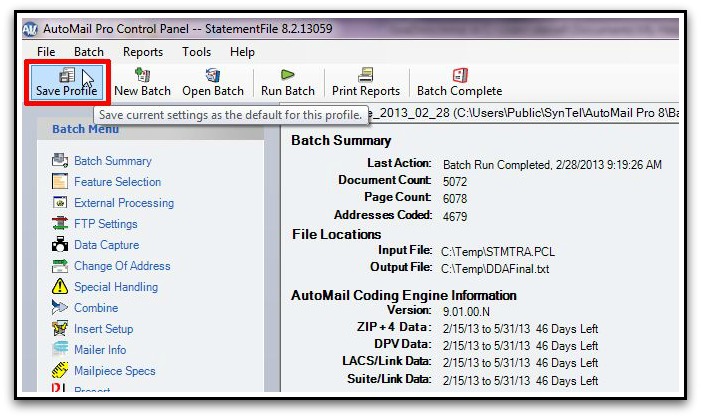
| 1. | From the 'Batch Menu' select Mailer Info > Permit Holder / Mailer and ensure the following fields are populated. |
| i. | ZIP+4 (must match 'Location Mailing From' ...NOT your physical address) |
| ▪ | NOTE: If the Mailing Agent field, Mailing Prepared For field, and / or Publisher fields are populated they MUST also contain |

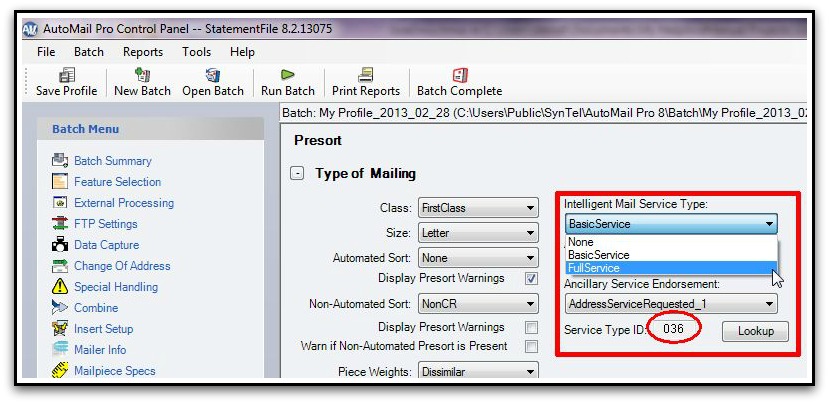
| 2. | Select Presort from the left-side 'Batch Menu'. |
| 3. | Change Intelligent Mail Service Type to 'FullService'. |
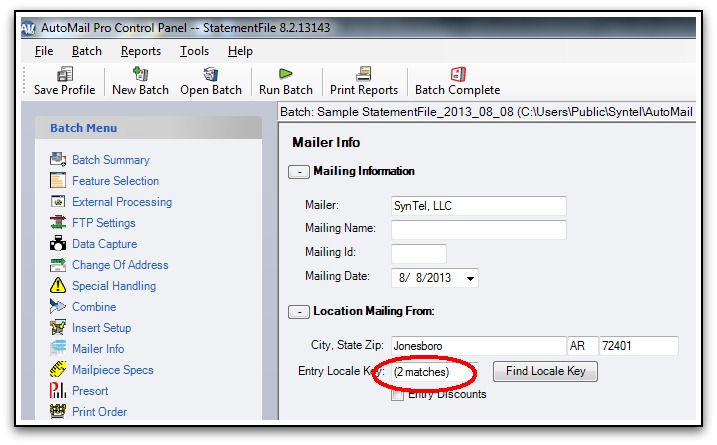
| 4. | Click on Mailer Info so that you can populate the 'Entry Locale Key'. |
| a. | If a ZIP Code is already stored in the ZIP field, under Location Mailing From: heading, you'll need to click the  button. button. |
| b. | If a ZIP Code is NOT already stored, enter the ZIP code from which your mailing will be sent. That is, the ZIP Code of the local post office you are mailing from. |
| ▪ | It is possible that multiple matches will be found, as shown below. If only a single facility exists, the Entry Locale Key: field will be populated accordingly. |
| ▪ | If this occurs, click to be presented with a list to select the closest / best match |
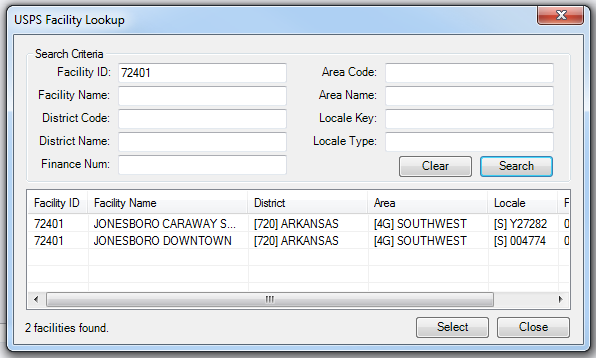
| ▪ | Simply high-light the desired facility, and click  |
| ▪ | The Entry Local Key: will be populated, accordingly, based on your selection. |
Configure Tray Tags:
It is also necessary to modify the tray tags created after switching to the eDocs method of Postage Statement upload. Here's how to do it.
NOTE: The below steps will be effective for ALL Profiles configured in AutoMail®.
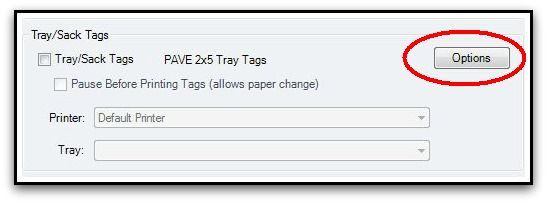
| 2. | Select Print Reports from the Batch Menu. |
| 3. | In the Tray/Sack Tags section of the screen, click Options. |
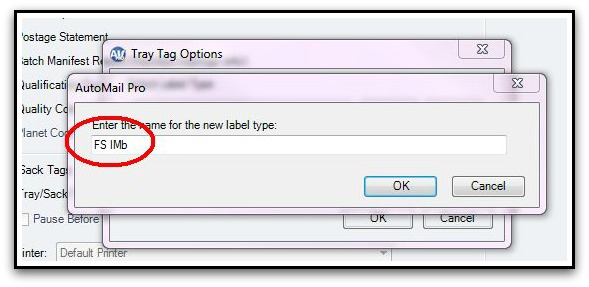
| 4. | Select Create New Label |
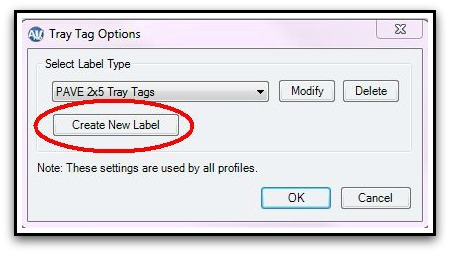
| 5. | Name the label "FS IMb". |
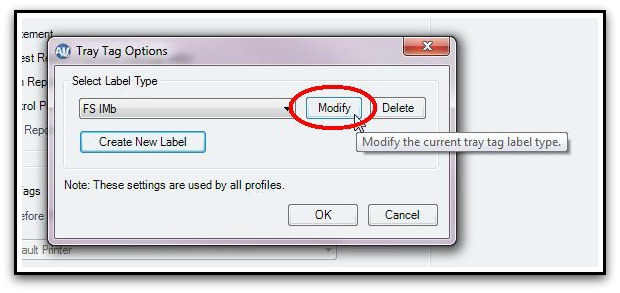
| 6. | After creating the new label, and with the label already selected, click the Modify button |
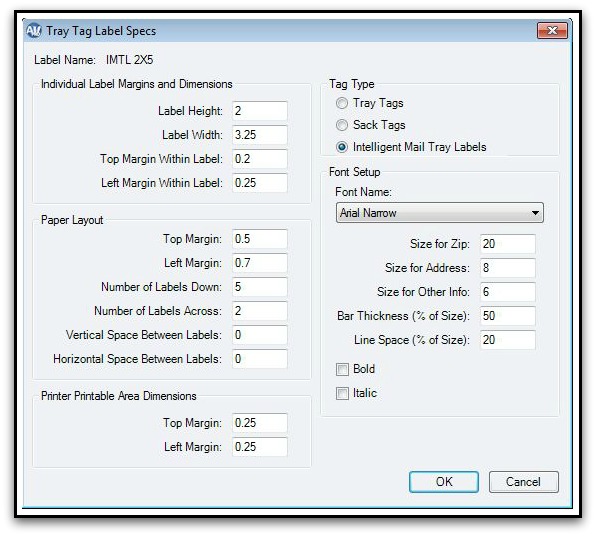
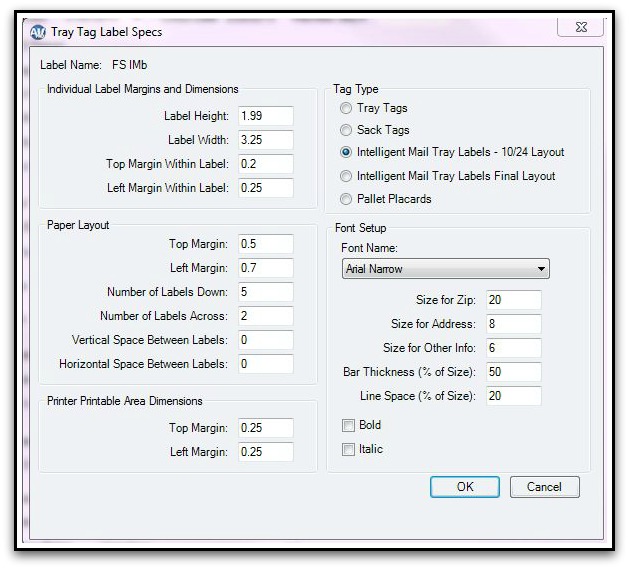
| 7. | Depending on your version of AutoMail®, configure the new label as shown below |
AutoMail® v7
AutoMail® v8
| 8. | Click OK when finished. |
| 9. | Click OK to close out Tray Tag Options window |
| 10. | Your new label, FS IMb, will be selected |
| 2. | NOTE: Mailer info and full service must be changed/set for ALL Profiles |

|