There are a few general "themes" when discussing the configuration, or design-work, involved with successfully processing, and producing output, from AutoMail® generated files with AutoDocs™.
Whether used for presorting / manifest mail for discounting purposes or not, the AutoMail® application is, at least, used as a catalyst for all files flowing into AutoDocs™. Think of AutoMail® as a pre-processor for AutoDocs™. The next section will outline the specifics of Designer Data a bit more, but it is important to understand the basic fundamentals of how AutoDocs™ gets its data for the purpose and goal of formatting and design.
AutoMail® is configured to apply certain tags, or keywords, by which AutoDocs™ will recognize each document and each page of each document. This gives AutoDocs™ the ability to construct each document and uniformly apply any design features across a group of documents (logos, static text, dynamic text, text formatting, etc.).

click for larger image
|
The Design Process
As a matter of practice and procedure... it is a good idea to begin the "design" process by creating needed Overlays.
| • | Think about the overall picture and what is being accomplished. For example, if you have a multi-page document then you'll, most generally, want to create an overlay (template) for each page. |
| • | Furthermore, it is a good practice to create a generic (or blank) overlay in order that an undesirable overlay isn't applied to a form / page that is not defined to a "specific" overlay. |

click for larger image
How do I create an overlay(s)?
| 1. | Select Overlays from the lower-left menu in the AutoDocs™ interface. |
| 2. | Right-click on the Project Name in the top-left of the AutoDocs™ interface. |
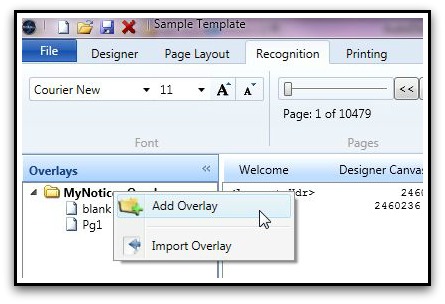
| 3. | Define an Overlay Name, Overlay Size, and define the page types / conditions this particular Overlay will be applied to. |
| o | Since this particular Overlay will apply to the very first page of each document in the set ...we'll name it Pg1 and select First Page as the document page to apply to. |
| o | When you click OK you'll see the named Overlay appear within the left-side Overlays menu. |

click for larger image
| 4. | Overlay Identification defines the particular criteria by which the "elements" on an overlay are selected / identified. |
| o | AutoDocs™ is very straight-forward in its methodology of "gathering" data from files. It uses a standard Line, Column, Length methodology to "pick up" data. |
| ▪ | NOTE: AutoDocs™ is zero-based in these methods. When making those determinations ...always start counting at 0 (zero). |

click for larger image
|
| 1. | Select Datasets from the lower-left menu. |
| 2. | To select a particular section of data by which to determine each account / document Click+Drag over the <Account Hdr> text on the Designer Data form.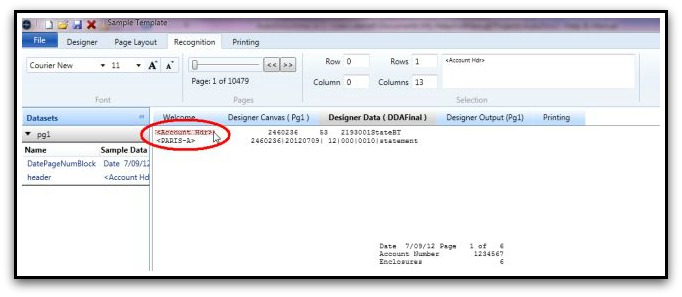 |
| 3. | Once you've high-lighted the data for which you wish to determine each new document Right+Click and select Create Text Designer Snippet. |
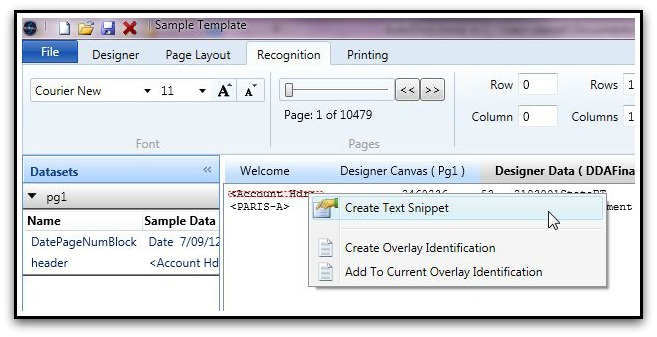
| 4. | Based on the Text Snippet created you can define that snippet of data. Give it a name, which Overlay it will apply to (Apply to Dataset), etc. As you've performed step 2 above you'll notice that the Start Column and End Column are populated. AutoDocs™ always starts with a base of 0 (zero) when counting lines or columns (rows). You'll use this data to distinguish between documents for future files of this particular type. |

click for larger image
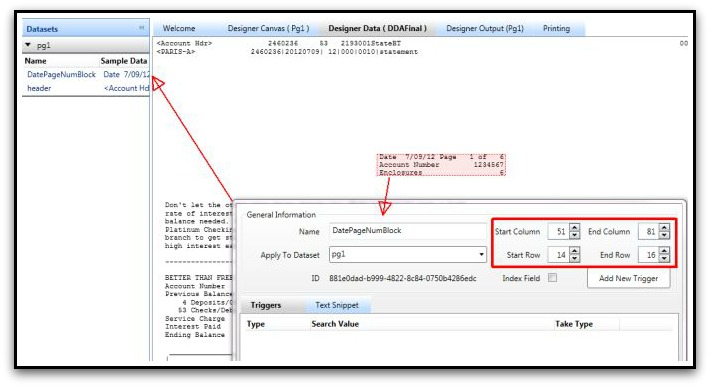
| o | Repeat this for other Text Snippets you wish to apply to Datasets. In the example below, I picked up the block of data which contains the Date, Page number, Acct #, and Enclosures. We'll use that later to apply to the Designer Canvas; where we actually design the layout of the form to be printed. |

|
|
As the name suggests.. the Designer "Canvas" is where the art of design occurs. Elements such as graphical logos, document barcodes, data snippets, etc. can be strategically placed on the page. Further, data can be applied dynamically on the page. Using the example below you'll observe that we have a 'Designer Item' (snippet) named 'DatePageNum

click for larger image
Here are the Properties of the 'DatePageNumBlock' text snippet.

click for larger image
|
Designer Output provides a preview of....
| a. | the form(s) / overlay(s) you've created... |
| b. | then applied data to, using Designer Data. |

click for larger image
|