<< Click here to display Table of Contents >>
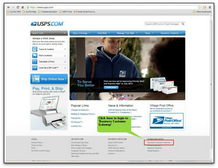
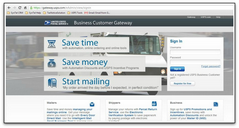
The steps outlined below will guide you through your USPS Business Customer Gateway account to verify successful upload of the eDocs Batch.
Upon logging in... select Electronic Data Exchange (PostalOne!) in the Design & Prepare section of Business Customer Gateway.
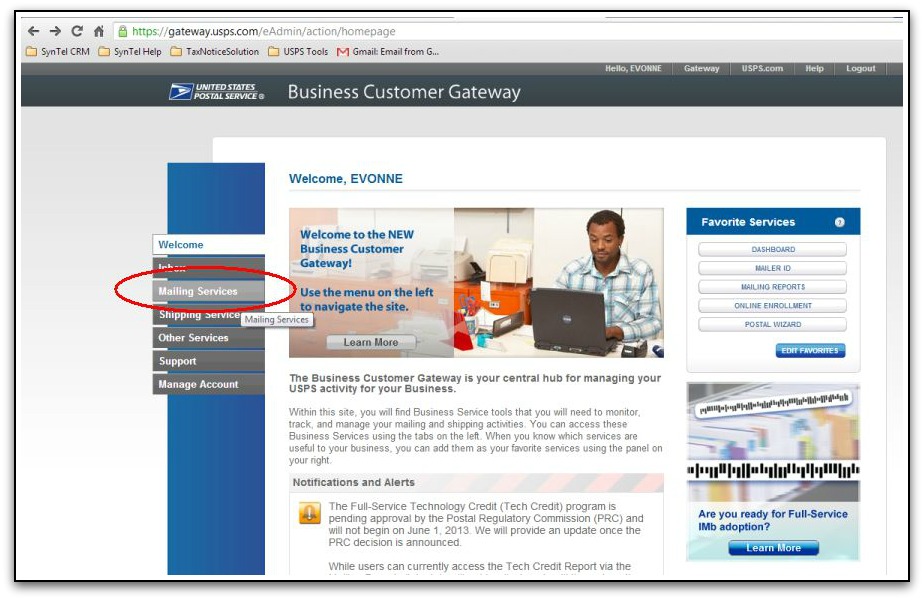
Select 'Electronic Data Exchange (PostalOne)'.
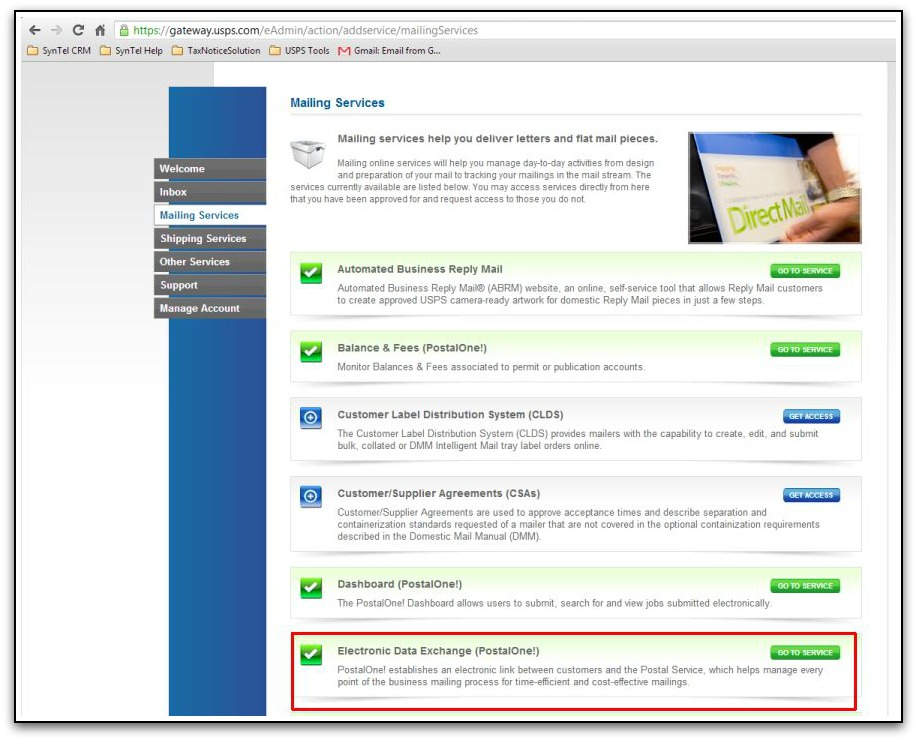
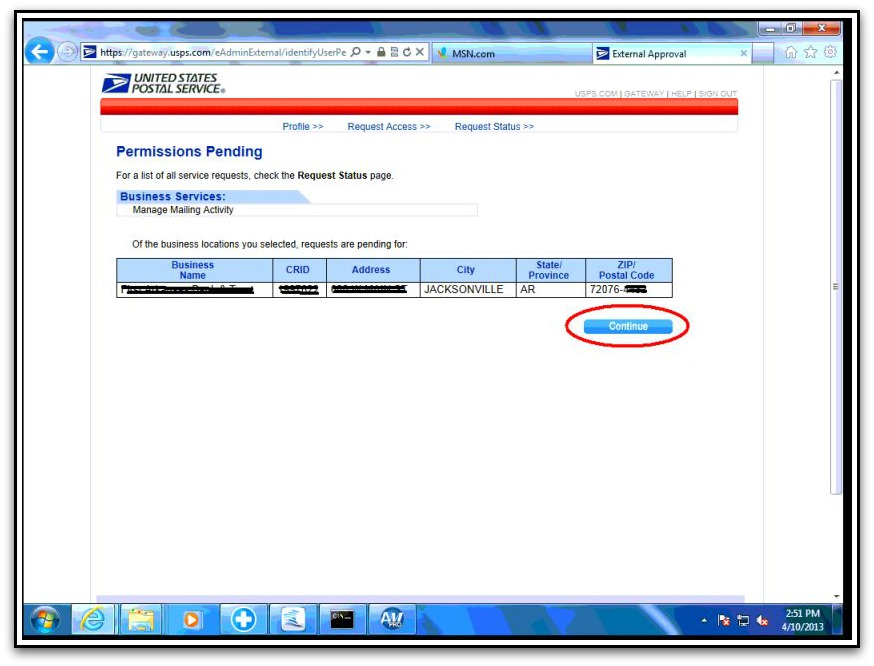
If you see the screen, below, after selecting Electronic Data Exchange (PostalOne!) then you simply need to be authorized for this service. A couple of mouse-clicks will do it.
| 1. | Confirm your Business Name, CRID, Address, City, ST, and ZIP |
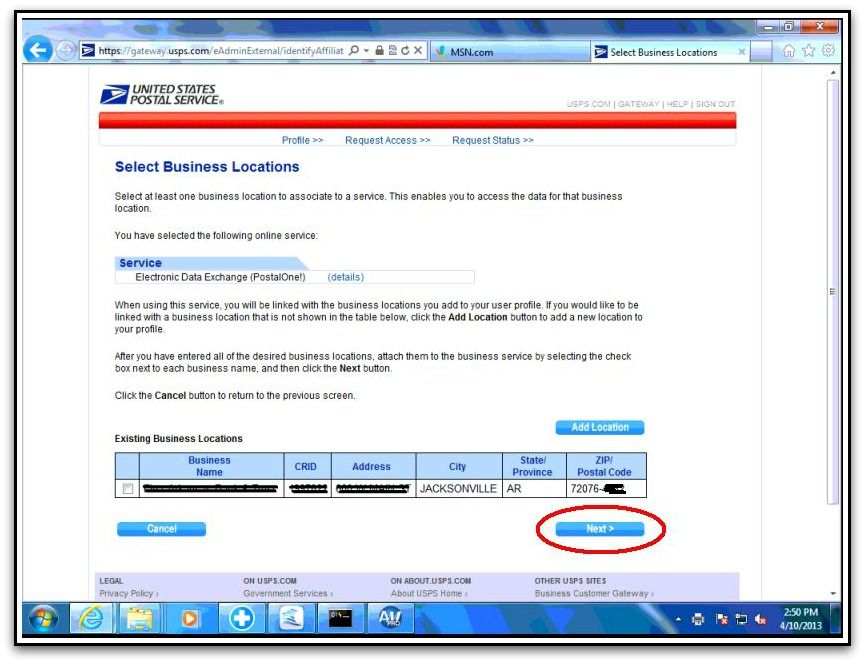
| 3. | Lastly, click Continue. You'll then be directed to the 'Electronic Data Exchange' screen. |
|

|
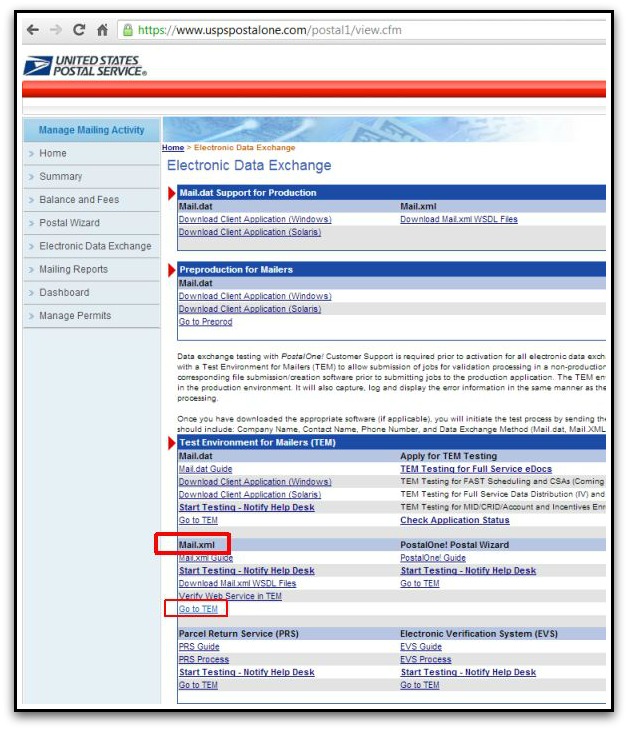
| 1. | Under the headings Test Environment for Mailers (TEM) > Mail.XML > select Go to TEM. |
| o | BE CERTAIN that you click the Go to TEM link under the Mail.xml heading, as shown below. |
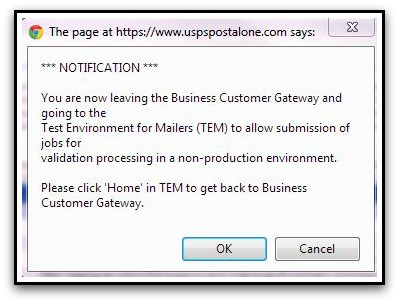
| 2. | Click OK on the notification window that appears. |
| 3. | Select Dashboard from left-side menu |

| 4. | Now, let's search for that Job ID. Remember, you're simply verifying what eDocs uploaded. |
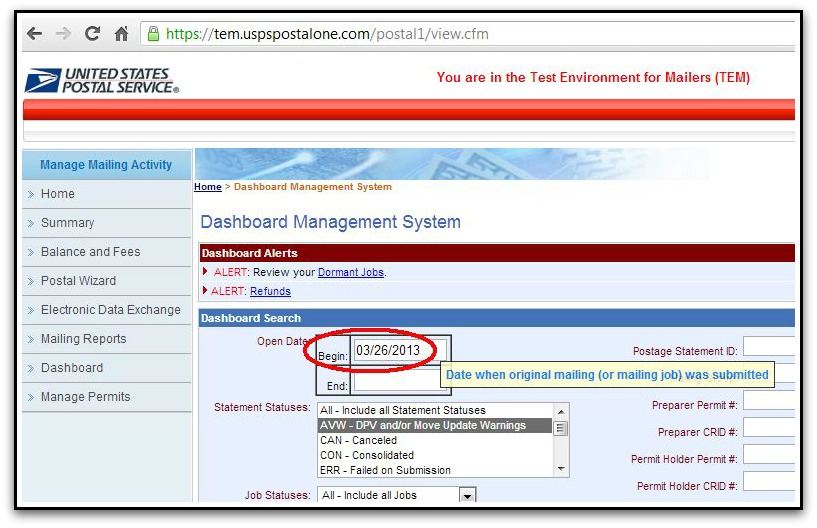
| 5. | Under the Dashboard Search heading simply ensure that the date populated (if pre-populated) is older than the date you uploaded the mailing via eDocs |
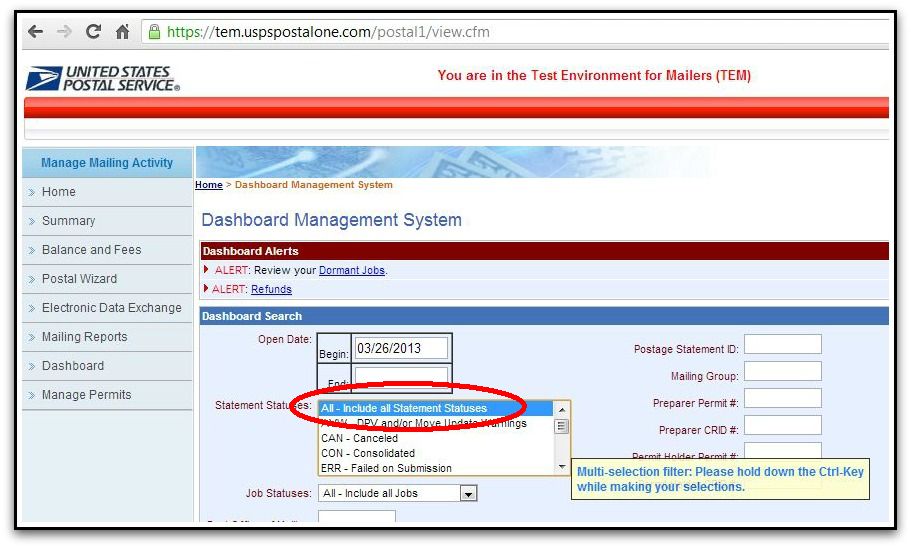
| 6. | Select All - Include all Statement Statuses from the 'Statement Statuses:' section just below the date fields. |
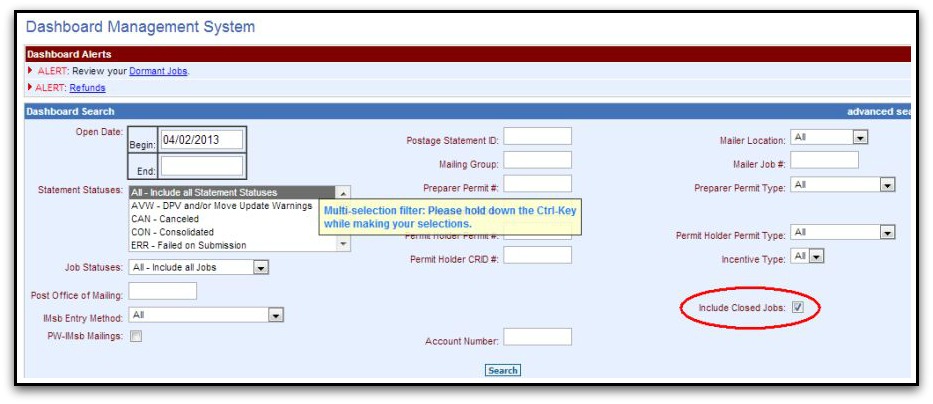
| 7. | Be sure and select the Include Closed Jobs check-box on the right-hand portion of the same interface. |
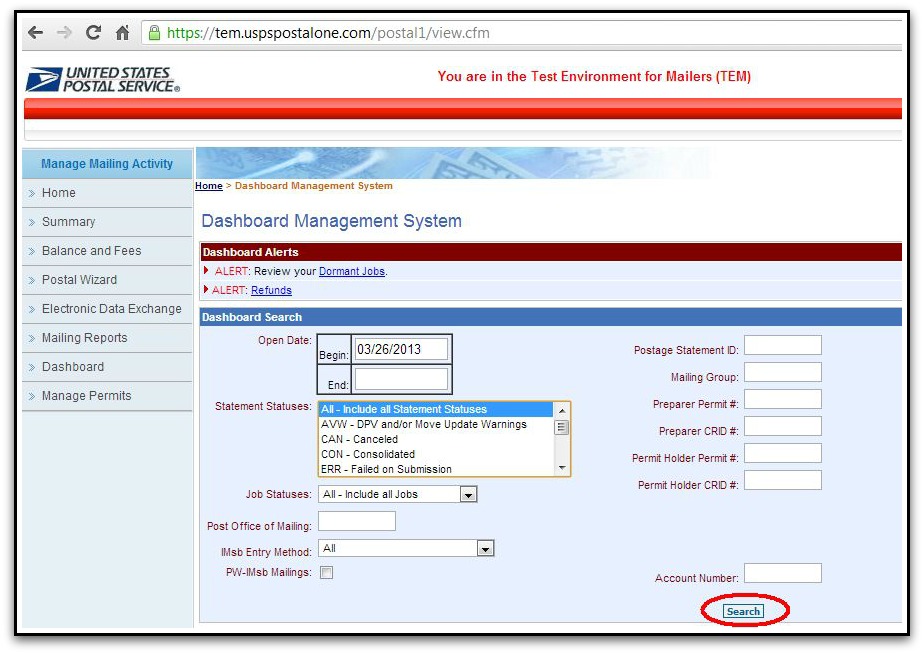
| 8. | Click Search to the lower-right |
| 9. | The Search results should return the Batch (job) you uploaded for testing. |
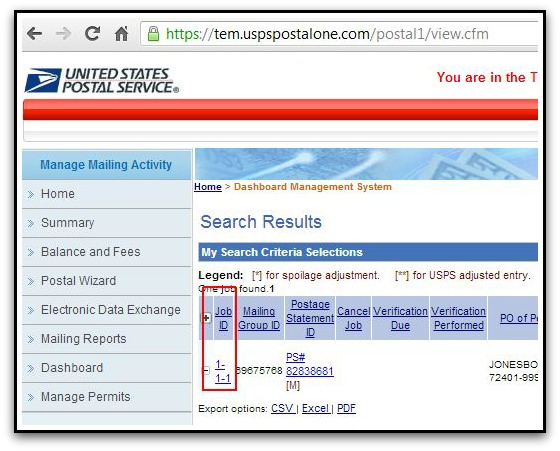
| 10. | If you DO NOT SEE a Job / Job ID, as exemplified above, please contact the USPS PostalOne! HelpDesk at 1.800.522.9085, option 3, then option 6 or e-mail the PostalOne! HelpDesk at PostalOne@usps.gov. |
| o | Include your Company Name, address, and CRID confirming that you have uploaded a test, but indicate the job is NOT displaying in the TEM (Test Environment for Mailers). |
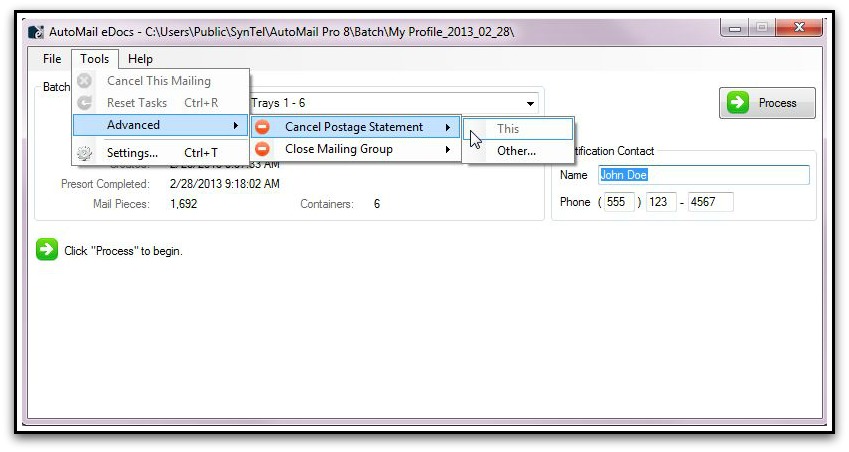
| 11. | Using eDocs you can cancel the test Job in the PostalOne! Dashboard. |
| o | Select Tools > Advanced > Cancel Postage Statement > This |
| 12. | When you've observed the Job ID for the mailing you just uploaded as a test ...you are now clear to use eDocs. |
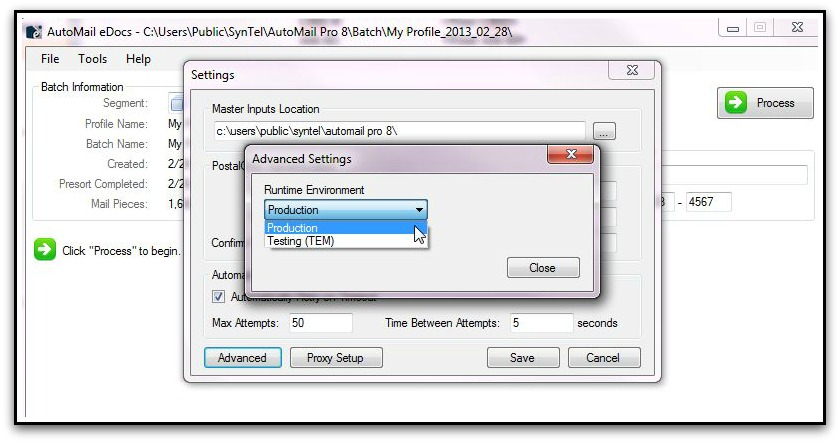
| o | IMPORTANT: Once eDocs is tested, and you've confirmed the upload, you must switch eDocs to "live" operating mode. |
| ▪ | In eDocs application... select Tools > Settings > Advanced |
| ▪ | Select Production and click 'Close' |
CONGRATULATIONS! You have now successfully tested eDocs to upload 'Postage Statement' information for each manifest mailing.
NOTE: Per USPS regulations, you must continue to deliver a printed / paper copy of the Floating Batch Manifest report with each mailing. eDocs is designed to upload Postage Statement information only.
AN IMPORTANT FINAL NOTE:
| o | If you have completed eDocs implementation we would appreciate you sending us an e-mail letting us know. We'll flag your account in our database as Full-Service. Just send an e-mail to support@syntelllc.com and let us know that you've completed this process. |
So, how do I actually use eDocs?
Click here to view the full version of the eDocs manual.
|


