This document provides a step by step guide to configuring and deploying Ptiney Bowes' TrackMyMail® solution, using AutoMail®.
| • | TrackMyMail® is a solution sold by Pitney Bowes which allows a mailer to track every piece of mail shipped |
| • | With TrackMyMail® configured, a file will be uploaded to a Pitney Bowes FTP server which will provide a mailer the ability to search and view all mail that has been delivered to the post office. |
| • | Before starting the implementation the mailer should contact their Pitney Bowes representative responsible for the sale of TrackMyMail®. Pitney Bowes will provide all user / login information needed as well as FTP site credentials in order to successfully upload your TrackMyMail® file. |
Basic Items Needed:
| 1. | User ID and Password for customer |
| 3. | Mailer ID for the mailer. (Pitney Bowes will assign this number) |
| 4. | Email address of mailer contact, who will be responsible for tracking mailpieces, or one designated to receive the confirmations of delivery. |
| 5. | Intelligent Mail® barcode range numbers. (numbers assigned to each mailpiece for tracking. Numbers cannot be used more than once. Pitney Bowes will assign this range of numbers). |
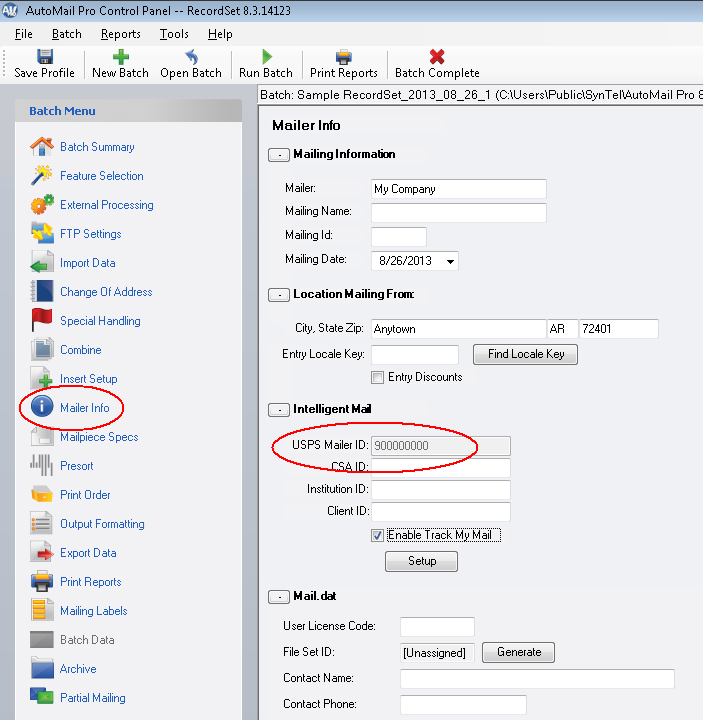
| • | In AutoMail®, click Mailer Info in the Batch Menu. |
| • | Enter the client’s ‘Mailer ID’ |
| • | Select ‘Enable Track My Mail’. |
|
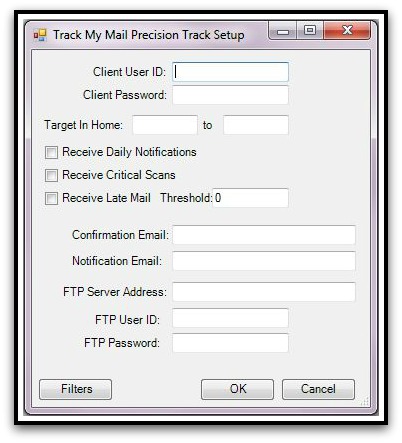
Click Setup below 'Enable Track My Mail' checkbox. You will see a ‘Track My Mail Precision Track Setup’ window.
|
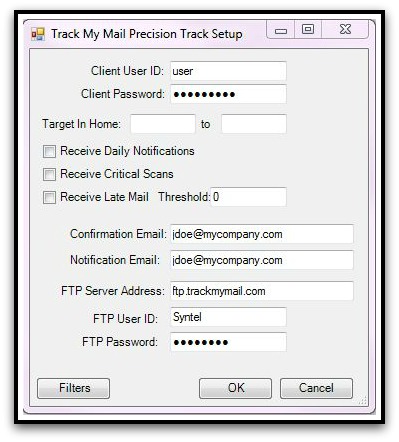
| • | Enter specified information in appropriate fields. Press ‘Ok’. |
| • | Confirmation Email and Notification Email provide the e-mail address where "verification of receipt" or "notification of denial" are sent to the mailer. |
|
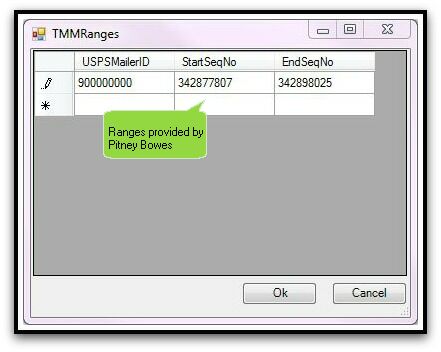
| • | Select Tools from the top / pulldown menu, then select Add IMB Ranges for TrackMyMail. 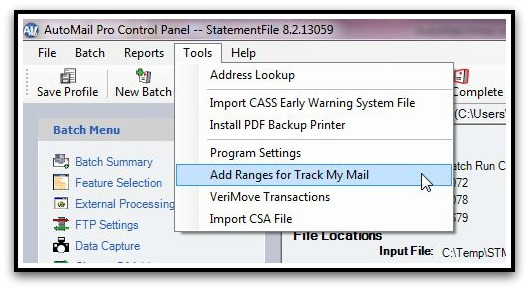 |
| • | Enter the 'USPSMailerID’, 'StartSeqNo’, and ‘EndSeqNo’. |
| • | Click the ‘Save Profile’ button in the Quick Access Toolbar. |
|
TrackMyMail® is configured.The mailer will simply select the Profile desired and process as normal.
After processing the following must be performed.
| • | Select ‘Batch’ from the top menu and choose ‘Upload Track My Mail File’. |
| • | You will then see a ‘Confirm Upload’ window. Select ‘Yes’. |
If using any additional AutoMail® Profile(s), and those in need tracking with TrackMyMail®, the above procedures should be performed for each respective Profile.
|
Once the file is uploaded to the TrackMyMail® ftp site, the mailer contact will receive a confirmation email indicating the file was successfully received or if failed for any reason. If the mailer receives e-mail indication that the file failed, Pitney Bowes should be contacted, using contacts below.
TrackMyMail® Customer Service: tmmcustomerservice@pb.com
Judy Kalus, Sr Business Analyst: judy.kalus@pb.com O: 615-873-4266
For any questions regarding the AutoMail® configuration of TrackMyMail® please contact AutoMail Technical Services
|


