Release a print job

Contents
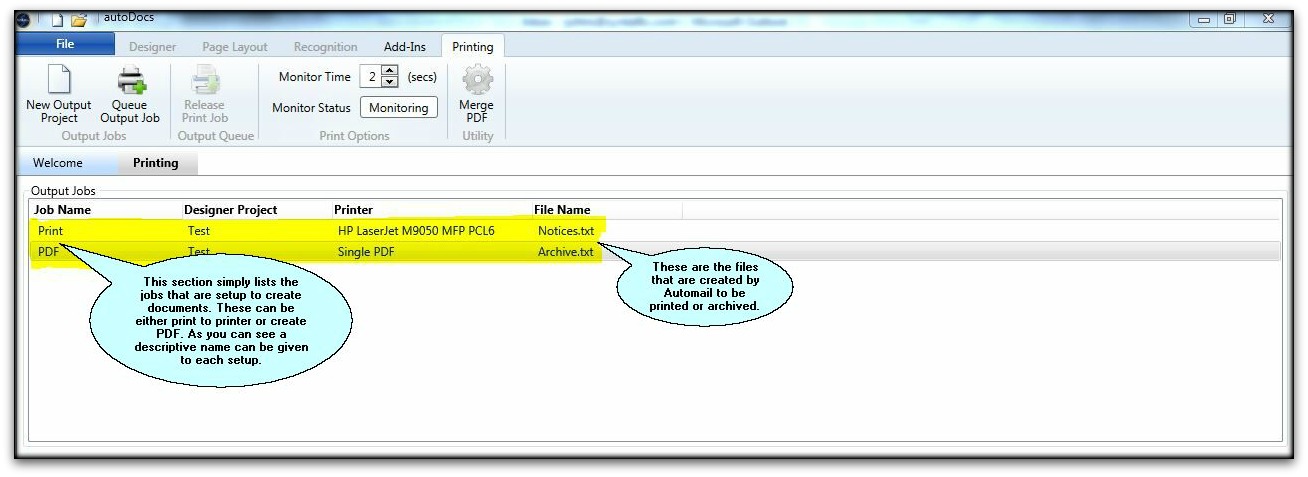
1. After selecting the 'Printing' tab, you will see the following screen. Most typically, print jobs will be setup in the 'Output Jobs' section within AutoDocs™. This section simply lists the jobs that will either be used to
send job directly to a printer or to create PDF files. As you can see, each job has a descriptive name (this can be changed), the name of the printer, and the file that has been created by AutoMail® that will be used to
produce the documents.
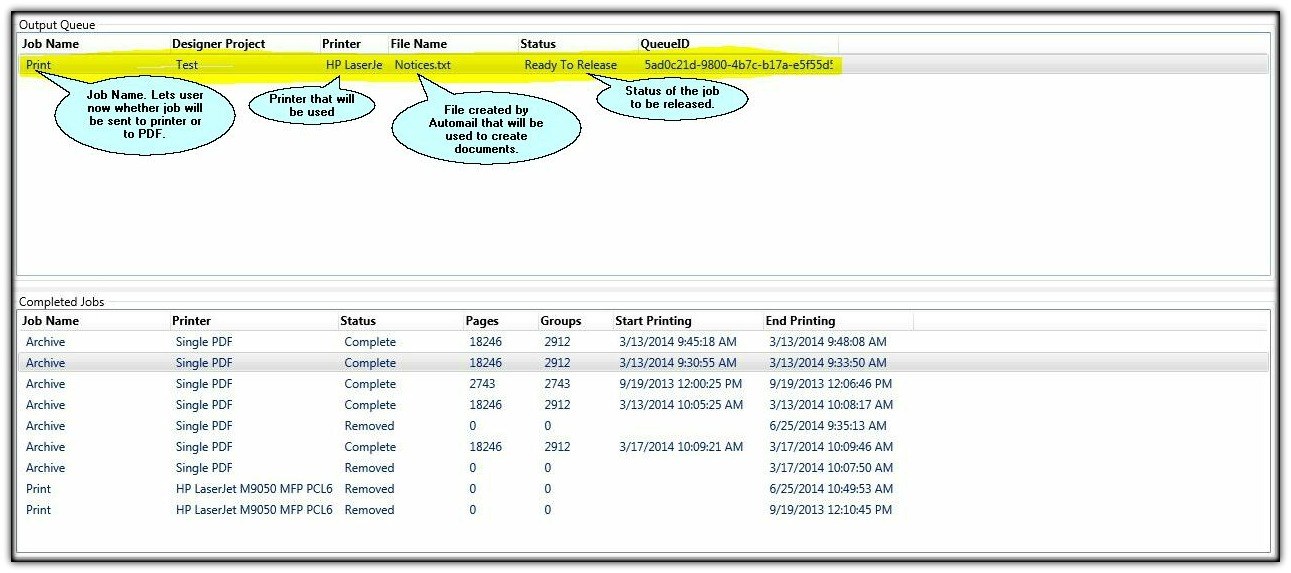
2. The next section you see is the 'Output Queue'. This section actually holds the job that is ready to be released. As you can see, there is the 'Job Name' to let you know that this will be released to the printer and it has the
'Printer' listed that will be used. Also, you can see the 'Status' of the job. This lets you know that the job is 'Ready To Release'.
3. You will also see a 'Completed Jobs' section. This lets the user know whether or not the print job completed or was removed and how many documents were created or printed.
4. While pointing to the print job, press the right mouse button to see the menu shown below. This menu allows the user to release the job, remove the job, or preview the job before printing.


Click Image to Enlarge